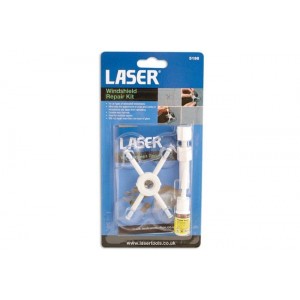
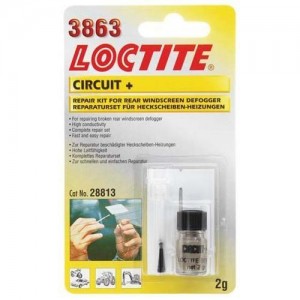
Suitable for all laminated glass. Makes stone fragments and cracks less visible and stops their further cracking. Not suitable for cracks over 30cm and cracks that run out to the glass. Reusable - enough from the package to repair multiple notches. The kit removes air from the glass crack and fills it with a repair agent. The substance solidifies on exposure to UV (use a UV lamp or direct sunlight). Multi-layered glass, improves only one layer. For best results, use the kit immediately after injury if water or dirt has not yet entered. If the lesion is already dirty and damp, there is a chance that the substance will not be properly absorbed for the repair to be satisfactory.
Instructions for use:
>
- Avoid direct sunlight at the beginning of the repair.
- Clean the damage with dry and clean paper. The glass damage should be dry and clean. & nbsp; If necessary, remove loose pieces of glass with the supplied blade.
- Install the suction cup holder (A) so that its hole is in the center of the injury (picture 2).
- Screw the guide (B) into the holder so that it presses gently against the center of the injury (picture 3.4). )
- Open the substance bottle (D) and instill 3-6 drops (depending on the size of the injury) into the guide (B). & nbsp; If the substance starts to flow from the bottom, tighten the guide by gently twisting it. &/>
- Now screw the pressure nozzle (C) all the way into the guide (B) (picture 6). & nbsp; Allow the substance to absorb into the lesion for about 4-6 minutes.
- Turn the summer nozzle (C) to 1/4 up to 1/2 turn to absorb the substance & nbsp; completely.
- Remove the summer nozzle (C) to allow air to escape from the holder (A).
- Reinstall the summer nozzle (C) to get the last air out of the glass & nbsp; damage. li>
- Now look at the damaged area at a 45-degree angle inside the glass. & nbsp; If there are air bubbles left, repeat steps 6-9.
- If no air is visible, remove everything from the glass.
- Wipe excess paper off the glass with paper.
- Where the damaged area is still visible, place a small drop of the substance directly on it. & nbsp; Now place the drying film (E) on the damaged area where the substance was used. Do not apply pressure to the drying film.
- Move the vehicle to direct sunlight or use a UV lamp. & Nbsp; The drying time of the substance is 5-10min. depending on the intensity of the light. & nbsp; If there is no direct sunlight, the substance dries longer.
- Remove the drying film.
- Make sure the substance is dry. Remove the blade (F) and scrape off the & nbsp; excess material.
- If the damaged area is still visible, repeat steps 13-15.
Repair cracks:
- 1 Avoid direct sunlight at the beginning of the repair.
- 2 Clean the damage with dry, clean paper.
- The glass damage should be dry and clean. < li> If necessary, remove loose pieces of glass with the supplied blade.
- Apply the repair agent to the glass crack at a rate of 3 seconds 1cm.
- Inspect the crack at a 45-degree angle to fill the crack with the substance.
- Allow to absorb for 5-10 minutes.
- If air remains, pressurize the inside of the glass until air escapes. & Nbsp; Press gently so as not to increase the crack.
- Once the air has been removed, wear re-apply the substance throughout the crack.
- Apply the drying film (s) to the entire repaired part.
- Move the vehicle to direct sunlight or use a UV lamp. & nbsp; The drying time of the substance is 5-10min. depending on the intensity of the light. & nbsp; If there is no direct sunlight, the substance dries longer.
- Remove the drying film.
- Make sure the substance is dry. Take the blade (F) and scrape off the & nbsp; excess substance.
Avoid any substances (other than glass washing) on the glass a week before and after using & nbsp; this product.
& nbsp;
5 other products in the same category:


